In today’s blog post, we’re focusing on the Sonoff TX Ultimate Smart Touch Wall Switch – a concealed installation switch with features that go beyond the basics. It is equipped with a large touch area, 28 LEDs for various lighting purposes, a speaker, vibration feedback, and gesture support. While these features offer great flexibility, flashing the device with the ESPHome open-source firmware can enhance its functionality and make it more tailored to your preferences. Also, by using ESPHome we become independent from the cloud.
This post aims to guide you through the process of flashing ESPHome onto your Sonoff TX Ultimate. By the end, you’ll have a smart switch that not only responds to your touch but also integrates seamlessly into your smart home setup.
Prerequisites
You will need the following:
- A Sonoff TX ultimate switch
- A USB-to-serial adapter for the flashing that supports 3.3V for Vcc
- Some jumper wires
- Some knowledge about electronics and ESPHome
Teardown the Switch
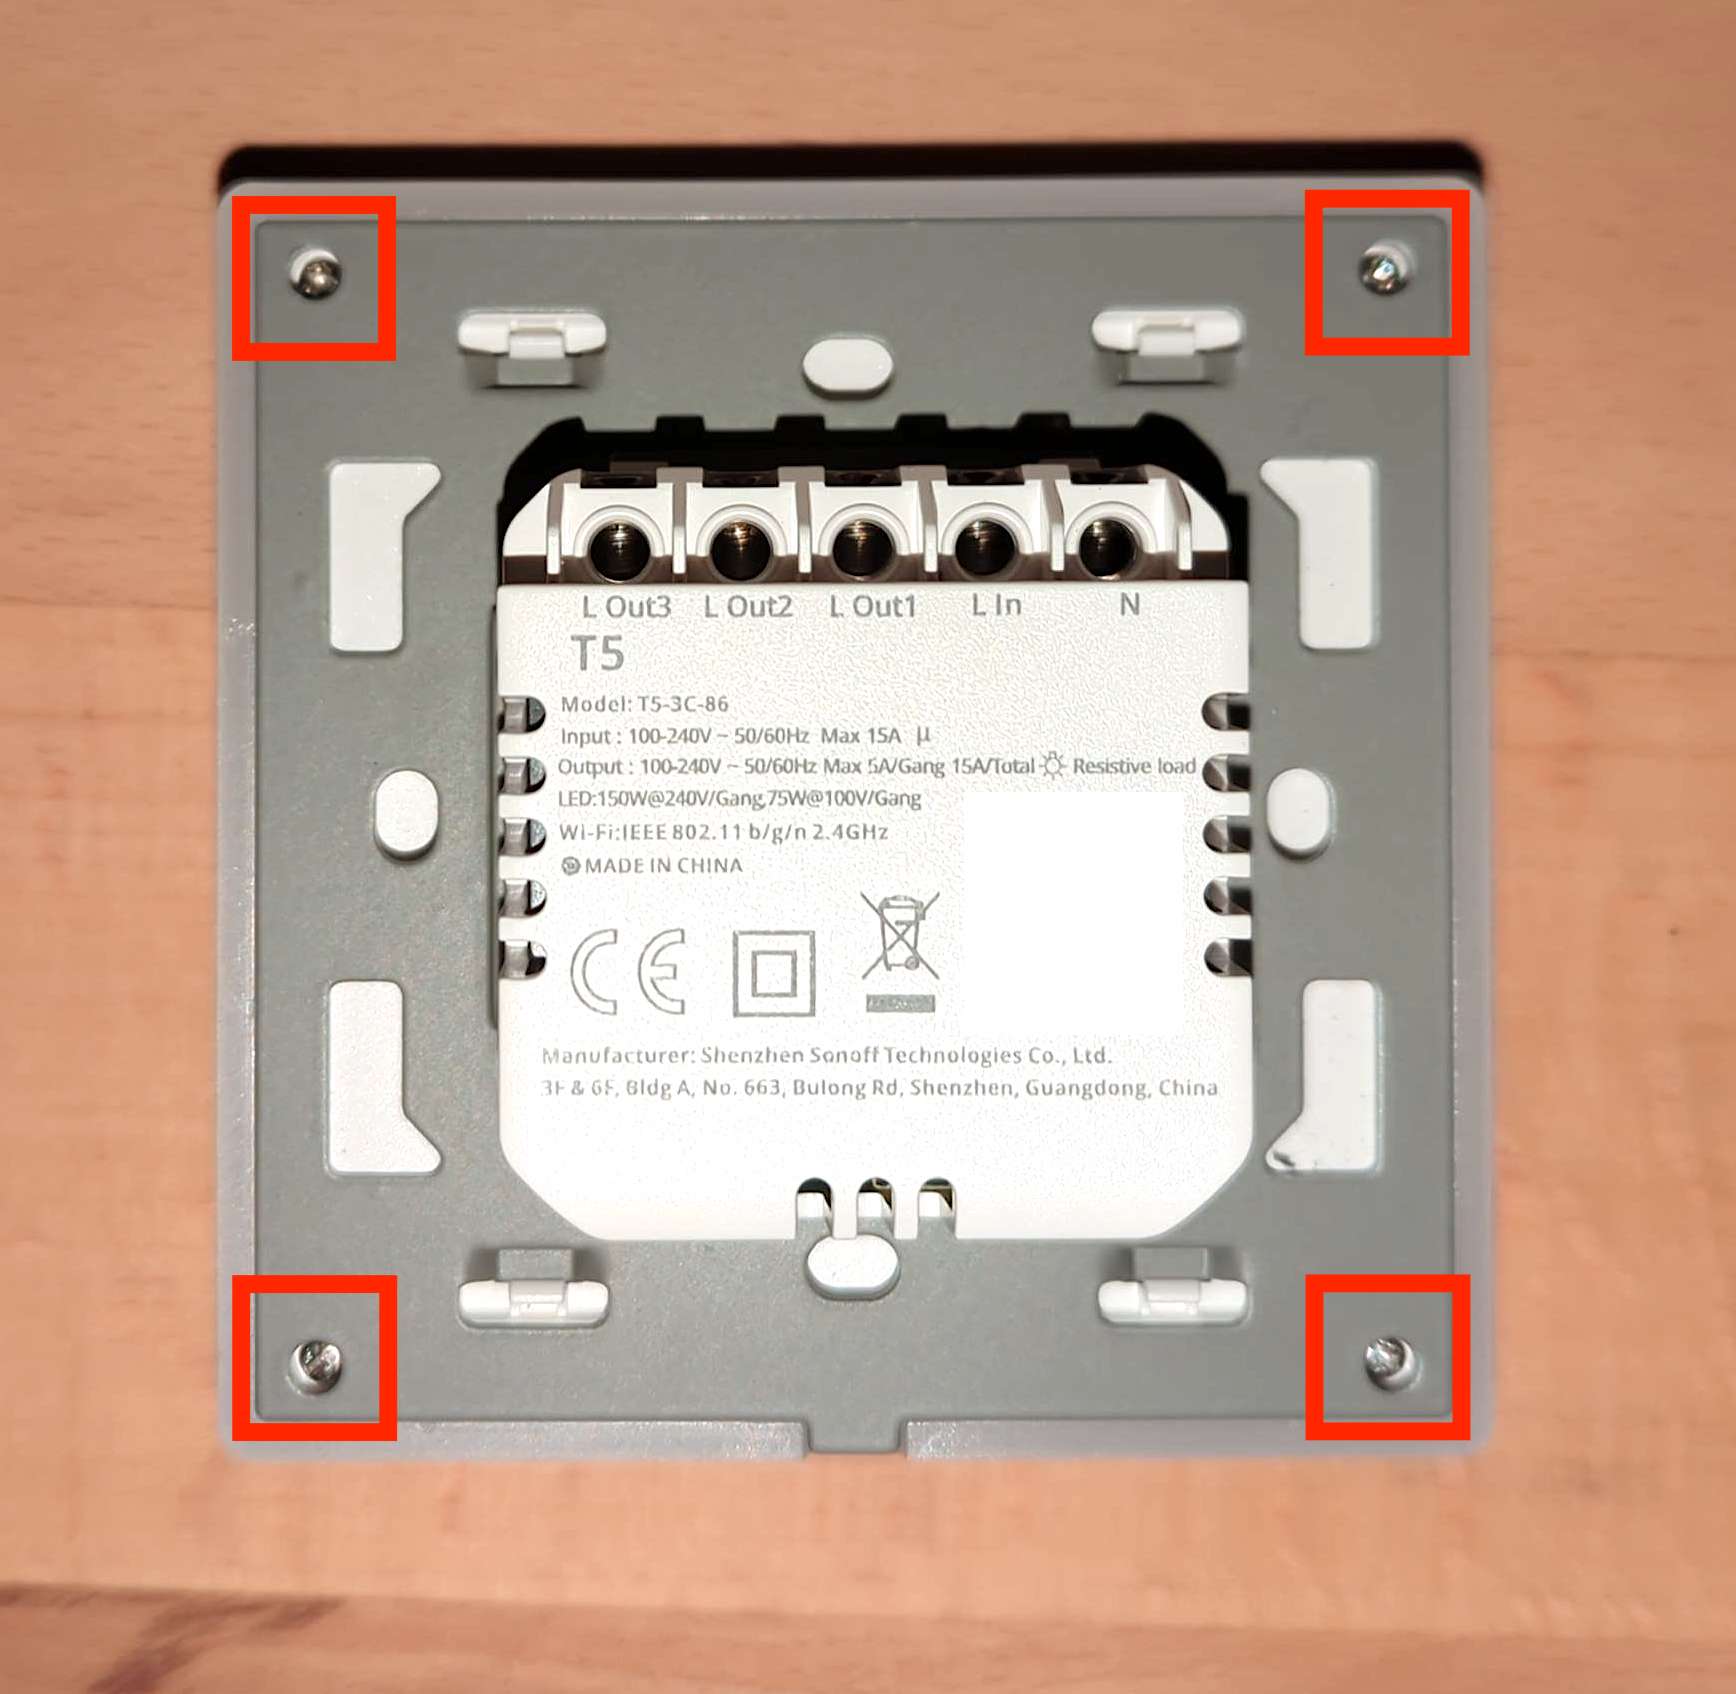
To get access to the pins for flashing the ESP32, we need to open the switch. In newer versions of the device, this is quite easy. Simply remove all 4 screws with a small phillips screwdriver. Then you can easily take out the back panel and you should see the circuit board.

Connect wires to the serial interface pins
The ESP32 needs to be flashed using a serial interface. So we need to connect some wires to the pins 3V3, RX, TX and GND. We also need to connect a wire to the BOOT pin. This allows us to set the ESP32 into flashing mode by connecting this pin to ground during boot.

We have two options here:
- Solder thin wires to all 5 pins
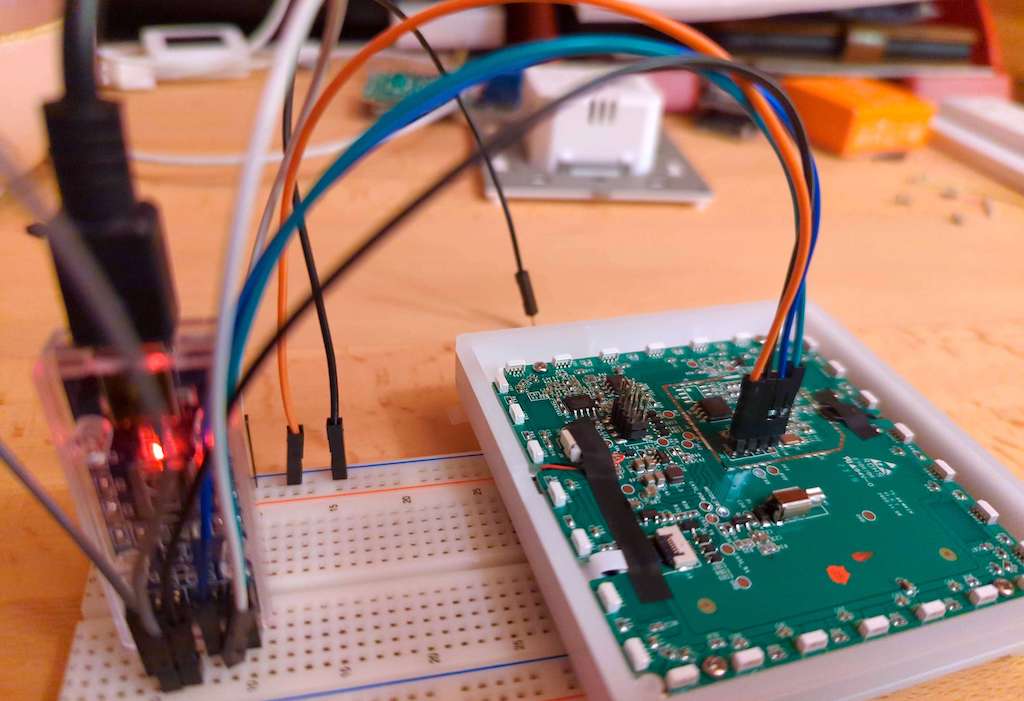
- Insert a 4-pin strip into the holes, and connect jumper wires to it. For the BOOT pin, we can simply connect a jumper to GND on a breadboard, and push the other end of the wire onto the BOOT pin pad while connecting the USB of our serial adapter.
Hint: If you choose the soldering option, I recommend you to use thin and rather short wires. Then you don’t need to desolder them afterwards. You can leave them in place for flashing the chip again in the future. Just make sure you isolate the ends with tape.
I chose option 2, so I just loosely connected the wires. Here is a photo of what it looked like.

Flash the device with the factory ESPHome firmware
Before flashing, you can optionally create a copy of the original firmware with the esptool.py (requires Python). Execute this command (replace the serial device with your own):
python3 esptool.py -p /dev/tty.usbserial-B001D4A9 read_flash 0x0 ALL ~/Desktop/tx-ultimate-original-firmware.binThis will also show some nice details about the chip. In my case, it was a ESP32-D0WDR2-V3-V3 (revision v3.0) with a flash size of 8MB.
Now, to flash the device, proceed like this:
- Open your ESPHome instance and create a new component.
- Choose “ESP32” as the device type.
- Click “Install” and choose the desired installation method. In my case, I will download the compiled binary and install it on the device using ESPHome Web.
- After installation, your newly created ESPHome device should change to status “online”.
Configuring the custom component
In this part, we will take a look at the custom component for the TX Ultimate that the YouTuber “SmartHome yourself” has created.
Add this code to the configuration that is already there in ESPHome:
// ... keep the default config. just add the following

substitutions:
  relay_count: "3"

packages:
  smarthomeyourself.tx-ultimate: github://SmartHome-yourself/sonoff-tx-ultimate-for-esphome/tx_ultimate.yaml@main
Make sure to change the relay_count to match your device model.
Integration with Home Assistant
The device should automatically show up in the notifications inside of Home Assistant. Just copy the API key from ESPHome, enter it in Home Assistant and the device is ready to use.
Troubleshooting
- The device does not turn on after flashing, while still connected to the USB-to-serial adapter. This is normal. The USB-to-serial adapter does not provide enough power, and the ESP32 will go into a boot loop. It will however boot properly when connected to the mains wires.
Summary
In this post we looked at the Sonoff TX Ultimate smart switch. We flashed the ESPHome open-source firmware for enhanced customization and independence from cloud services. The custom component we used for that provides many features out of the box, such as vibration, LEDs, long press, short press, touch gestures and audio.
Please share your feedback regarding this post, and also share your experience with the smart switch in the comments!


Me nejde spustit rezim boot porad to píše spojování 🙈😭