Proxmox Virtual Environment is a great way of hosting virtualized resources (virtual machines and LXC containers). But setting up such an LXC container, and then running Docker, is not too easy for a beginner. In this post, I will list the steps to get it running.
Basically, these are the main steps to take:
- Setup an LXC container (Debian) as the Docker host from a template
- Install Docker in that container
So let’s get started!
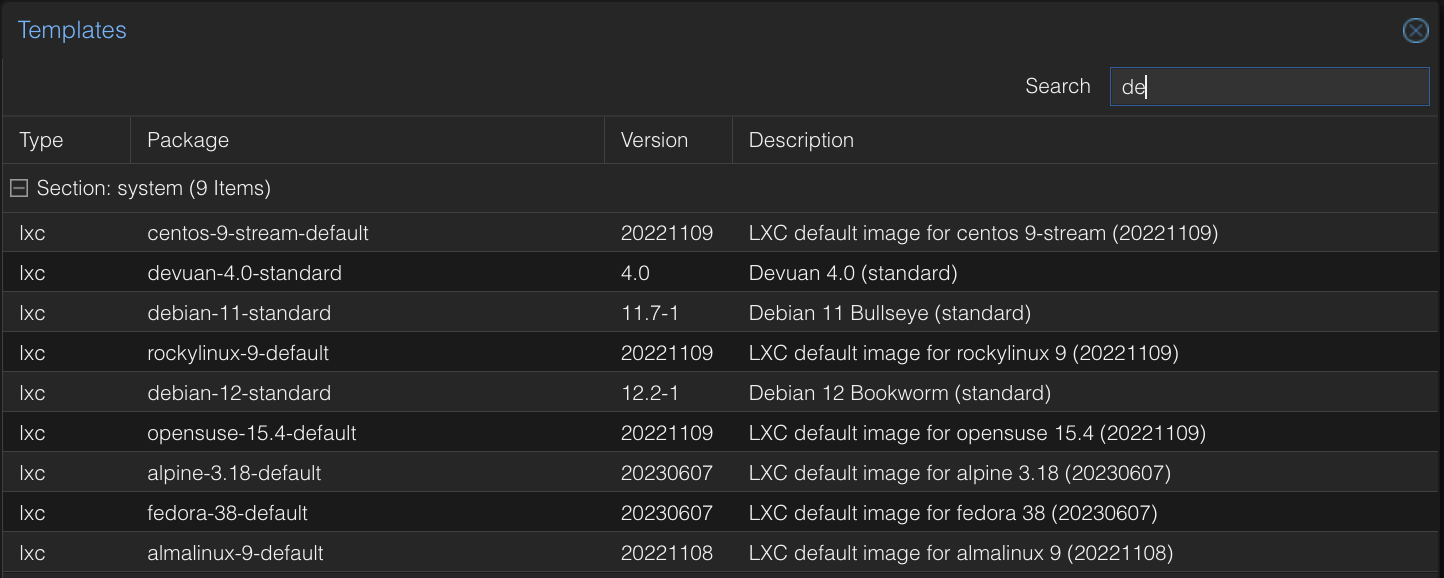
Step 1: Download a Debian LXC template
Every LXC container starts a template. If you don’t have a Debian template yet, go to your storage in the left panel, and in the right panel click on CT Templates > Templates. Search for the desired template (e.g. type “debian” into the search field), and choose the most recent one. Currently (11/2023), this is debian-12-standard.
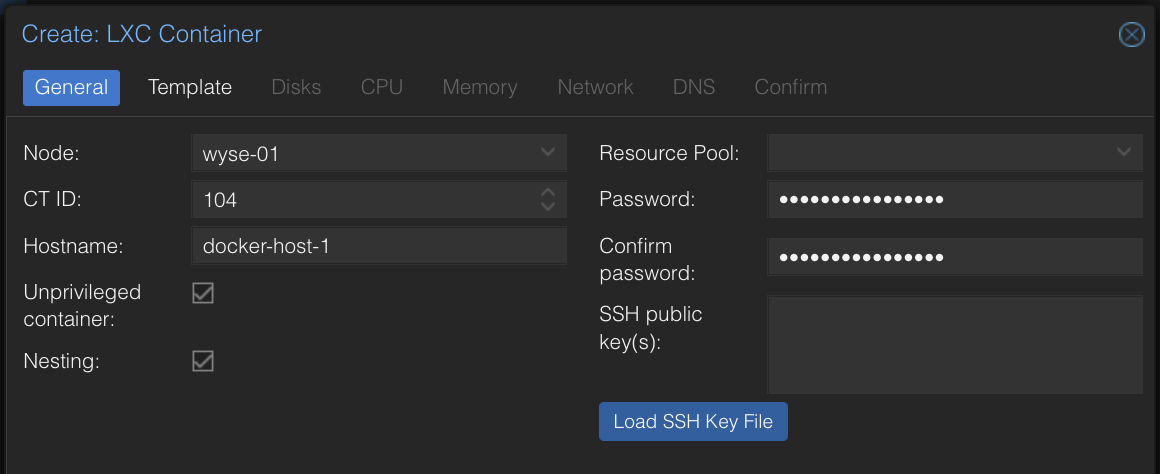
Step 2: Create the LXC container
At the top right, click on “Create CT”. Under “General”, some basic information about the system needs to be defined. The container should be unprivileged, needs a hostname, a password, and a free CT ID.
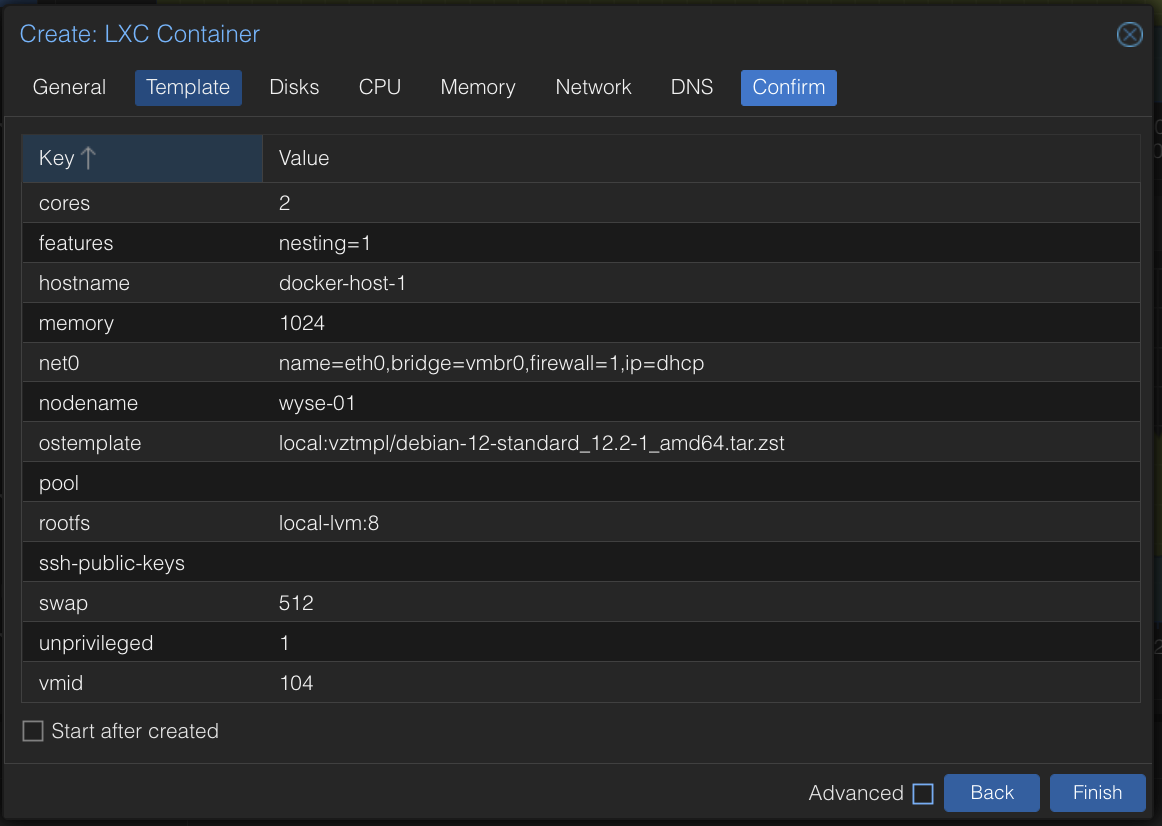
Under “Template”, choose your storage and select the Debian 12 template.
Under “Disks”, you could configure different partitions. For now, we will stick with one rootfs partition, and set the size to 8 GiB.
Under “CPU”, we set the core count to “2”, and under “Memory”, we set 1024 MiB of RAM and 512 MiB of swap.
Under “Network”, what you need to configure depends on your use cases. In my case, I will leave it at the default bridge vmbr0 (and IPv4 set to DHCP) since I need internet access for pulling container images. But later, I will change the interface of the container to a local-only bridge which I created (see this post here).
I leave the “DNS” settings empty, which will then use the host settings.
This is the final configuration. Do NOT enable “Start after created” (we need to do some additional configuration) and then click on “Finish”.
Step 3: Additional configuration
Select the container in the left panel, select “Options” in the menu and double click on “Features”. Enable “keyctl”, make sure “Nesting” is enabled and click “OK”.
Step 4: Prepare the package repository
This step is based on the Docker documentation.
Now, start the container and select “Console” from the menu. Login with the root user and the password you defined during configuration. We assume that you execute the following commands as the root user.
Update the packages and install the necessary packages to use the Docker repository over HTTPS:
apt update
apt install -y ca-certificates curl gnupg
Next, add the official Docker GPG key:
install -m 0755 -d /etc/apt/keyrings

curl -fsSL https://download.docker.com/linux/debian/gpg | gpg --dearmor -o /etc/apt/keyrings/docker.gpg

chmod a+r /etc/apt/keyrings/docker.gpg
And add the repository to the apt sources:
echo \
  "deb [arch="$(dpkg --print-architecture)" signed-by=/etc/apt/keyrings/docker.gpg] https://download.docker.com/linux/debian \
  "$(. /etc/os-release && echo "$VERSION_CODENAME")" stable" | \
  tee /etc/apt/sources.list.d/docker.list > /dev/null
Finally, update once again:
apt updateStep 5: Install Docker in the container
Docker requires the following packages:
apt install -y docker-ce docker-ce-cli containerd.io docker-buildx-plugin docker-compose-pluginStep 6: Confirm that it works!
docker run hello-worldThis should output the following:
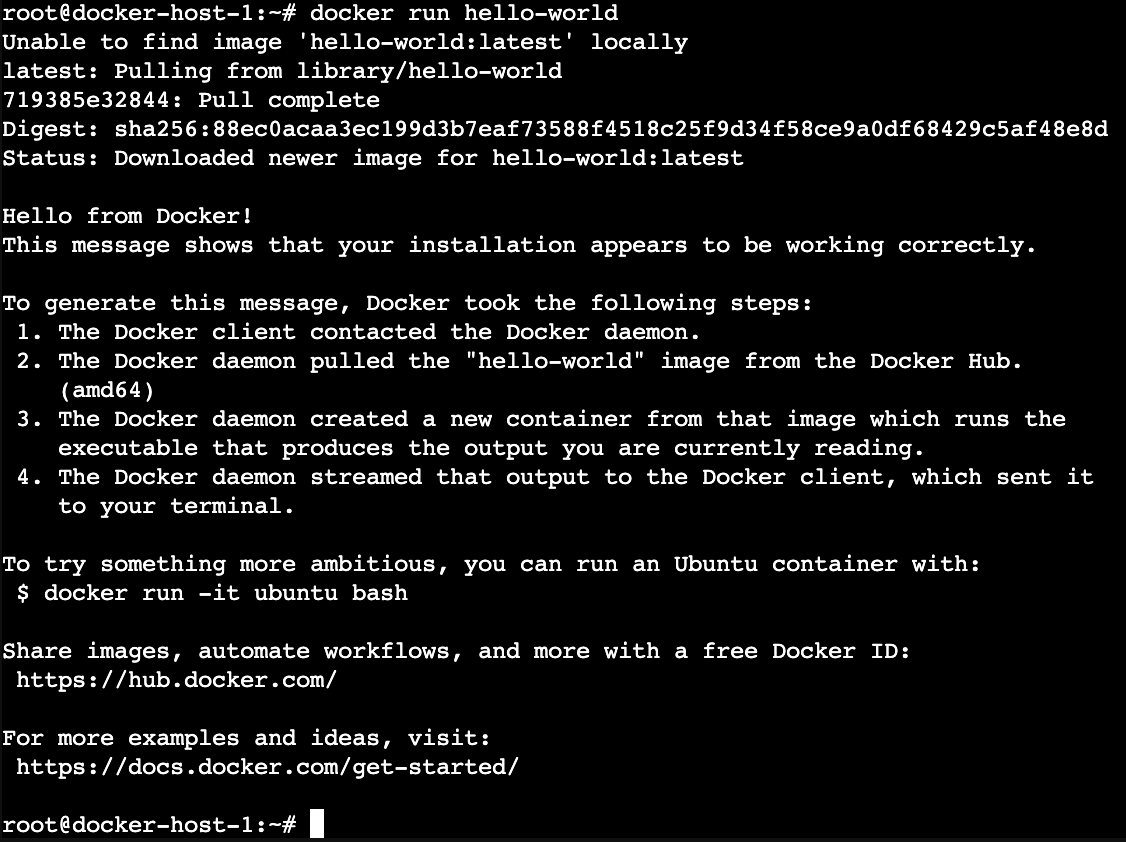
Success!