This post explains how to setup a current Raspberry Pi 4 with the most recent version of Raspberry Pi OS (most recent = at the time of writing: January 2022). Some details can also be found on the official website.
Step 1: Download the image
For Raspberry Pi 4, if you want to install the most recent 64-bit Raspberry Pi OS, you can get it here: https://downloads.raspberrypi.org/raspios_arm64/images/raspios_arm64-2021-11-08/
Step 2: Use diskutil to find the correct SD card drive
Run diskutil list to get a list of all drives connected to your Mac:
$ sudo diskutil list
/dev/disk0 (internal):
#: TYPE NAME SIZE IDENTIFIER
0: GUID_partition_scheme 1.0 TB disk0
1: Apple_APFS_ISC 524.3 MB disk0s1
2: Apple_APFS Container disk3 994.7 GB disk0s2
3: Apple_APFS_Recovery 5.4 GB disk0s3
/dev/disk3 (synthesized):
#: TYPE NAME SIZE IDENTIFIER
0: APFS Container Scheme - +994.7 GB disk3
Physical Store disk0s2
1: APFS Volume Macintosh HD 15.3 GB disk3s1
2: APFS Snapshot com.apple.os.update-... 15.3 GB disk3s1s1
3: APFS Volume Preboot 219.4 MB disk3s2
4: APFS Volume Recovery 1.0 GB disk3s3
5: APFS Volume Data 893.3 GB disk3s5
6: APFS Volume VM 1.1 GB disk3s6
/dev/disk4 (external, physical):
#: TYPE NAME SIZE IDENTIFIER
0: FDisk_partition_scheme *63.9 GB disk4
1: Windows_FAT_32 boot 268.4 MB disk4s1
2: Linux 63.6 GB disk4s2In this case, we see that /dev/disk4 is marked as external and physical, and has a total size of 63.9 GB (almost 64GB). So this is our SD card. To be sure, you can unplug the card, then to diskutil list, replug the card and then do a diskutil list again. The drive that is added on the second run will be your SD card.
Now unmount any mounted partitions using sudo unmount /dev/disk4sX (where X is the partition number starting from 1).
Step 3: Copy the image to the SD card using dd
We don’t need any third-party tools to flash a .img file to an SD card. We can use the following command:
$ sudo dd if=/path/to/file/2021-10-30-raspios-bullseye-arm64.img of=/dev/rdisk4 bs=8m- if: Short for “input file”. The path to the image we want to flash to the SD card.
- of: Short for “output file”. This is the path to the device to which we want to burn the image. In this case we use “rdisk” and not just “disk” to use the unbuffered device. This will result in a faster write speed.
- bs: This is the block size used for copying.
You can see the progress during copying by pressing Ctrl + T:
[Ctrl+T]
load: 1.54  cmd: dd 24139 uninterruptible 0.00u 0.02s
10+0 records in
9+0 records out
75497472 bytes transferred in 2.000245 secs (37744115 bytes/sec)
[Ctrl+T]
load: 1.54  cmd: dd 24139 uninterruptible 0.00u 0.06s
26+0 records in
25+0 records out
209715200 bytes transferred in 5.290478 secs (39640123 bytes/sec)
...
Step 4: Add WiFi config file
Since we want to do a headless setup, we need to prepare a wifi configuration file on the SD card so that we can access the Pi using SSH after power-up.
We place a file called wpa_supplicant.conf on the “boot” partition which is mounted on the Mac. It should contain the following:
ctrl_interface=DIR=/var/run/wpa_supplicant GROUP=netdev
country=<Insert 2 letter ISO 3166-1 country code here>
update_config=1

network={
 ssid="<Name of your wireless LAN>"
 psk="<Password for your wireless LAN>"
}
Step 5: Enable SSH headlessly
To ensure that SSH is active after boot, we also place an empty text file called ssh on the boot partition, using this command:
touch /Volumes/boot/sshStep 6: Login
That’s it. Plug in the Pi, find out the IP address in your router and login using
ssh pi@<your_ip>The default password is “raspberry”.
Step 7: Configuration
If you want, you can now configure things such as hostname, keyboard layout etc. For this, we use the tool raspi-config which is preinstalled on Raspberry Pi OS:
$ sudo raspi-config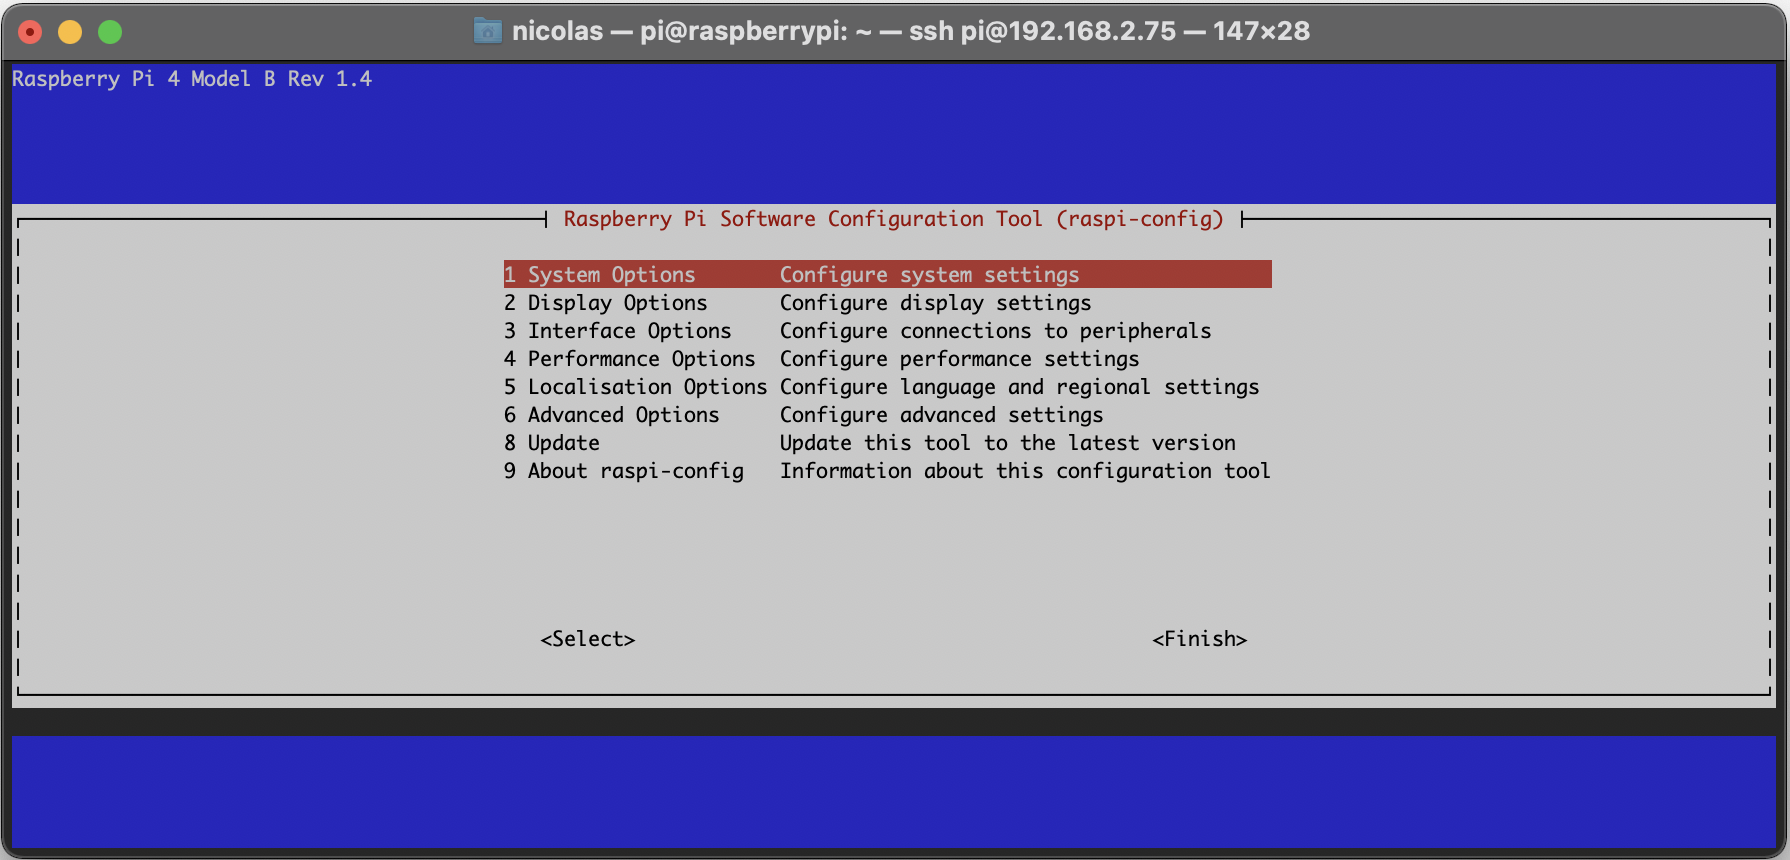
Step 8: Change password of “pi” user
Since we have enabled SSH in a previous step, we should also change the password of the user “pi” for security reasons.
When logged in as pi, execute the following command:
pi@nicolas-pi:~ $ passwd
Changing password for pi.
(current) UNIX password:
Enter new UNIX password:
Retype new UNIX password:
passwd: password updated successfully.
Step 9: Change password of “root” user
To be sure, we should also change the password of the root user as follows:
pi@nicolas-pi:~ $ sudo passwd
Enter new UNIX password:
Retype new UNIX password:
passwd: password updated successfully.